> ## Documentation Index
> Fetch the complete documentation index at: https://docs.calseta.com/llms.txt
> Use this file to discover all available pages before exploring further.
# Quickstart
> Get Calseta running locally in under 5 minutes
**Calseta is under active development.** APIs and features may change. We welcome feedback and contributions on [GitHub](https://github.com/calseta/calseta).
## Run Calseta locally
```bash theme={null}
git clone https://github.com/calseta/calseta.git
cd calseta
cp .env.local.example .env
docker compose up
```
That's it. The platform starts three services:
| Service | Port | Description |
| -------------- | ---- | ---------------------------------------------------- |
| FastAPI server | 8000 | REST API for alerts, enrichment, workflows, and more |
| MCP server | 8001 | Model Context Protocol server for AI agents |
| UI | 5173 | Web dashboard for alert management and configuration |
| PostgreSQL | 5432 | Primary store and task queue |
## Try the lab
The lab is a fully seeded demo environment with sample alerts, enrichment data, and a full-access API key. It's the fastest way to explore Calseta's capabilities:
```bash theme={null}
make lab
```
This seeds 5 alerts with enriched indicators, detection rules with full documentation, context documents, and workflows. A pre-configured API key is printed at the end:
```bash theme={null}
curl -H "Authorization: Bearer cai_lab_demo_full_access_key_not_for_prod" \
http://localhost:8000/v1/alerts
```
Use `make lab-reset` to wipe and re-seed from scratch. Use `make lab-stop` to stop all services.
## Create an API key
For non-lab usage, create your own API key:
```bash theme={null}
docker compose exec api python -m app.cli.create_api_key \
--name "My Agent" \
--scopes "alerts:read,alerts:write,workflows:read,workflows:execute"
```
Save the returned key immediately — it cannot be retrieved after creation.
## Open the UI
Once services are running, open [http://localhost:5173](http://localhost:5173) in your browser. The dashboard gives you a visual interface for managing alerts, configuring detection rules, enrichment providers, workflows, and more.
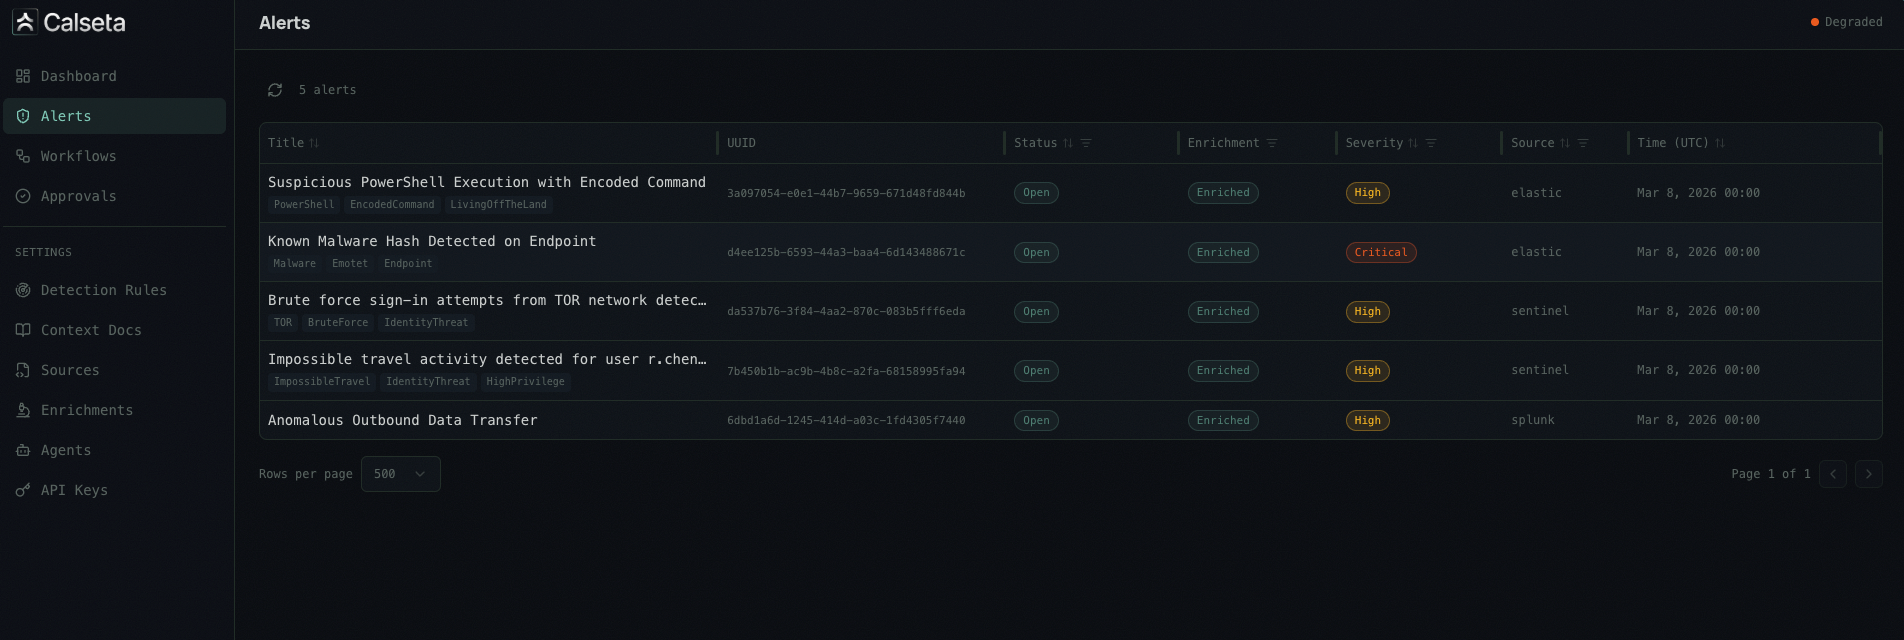 The UI is optional — everything it does is also available via the REST API and MCP server. Use whichever interface fits your workflow.
## Next steps
Understand the five-step pipeline: ingest, normalize, enrich, contextualize, and dispatch.
Create API keys and authenticate your requests.
Connect Microsoft Sentinel, Elastic, Splunk, or a generic webhook.
Explore the web dashboard for alert management and settings.
Connect your AI agent to Calseta via the MCP server.
The UI is optional — everything it does is also available via the REST API and MCP server. Use whichever interface fits your workflow.
## Next steps
Understand the five-step pipeline: ingest, normalize, enrich, contextualize, and dispatch.
Create API keys and authenticate your requests.
Connect Microsoft Sentinel, Elastic, Splunk, or a generic webhook.
Explore the web dashboard for alert management and settings.
Connect your AI agent to Calseta via the MCP server.